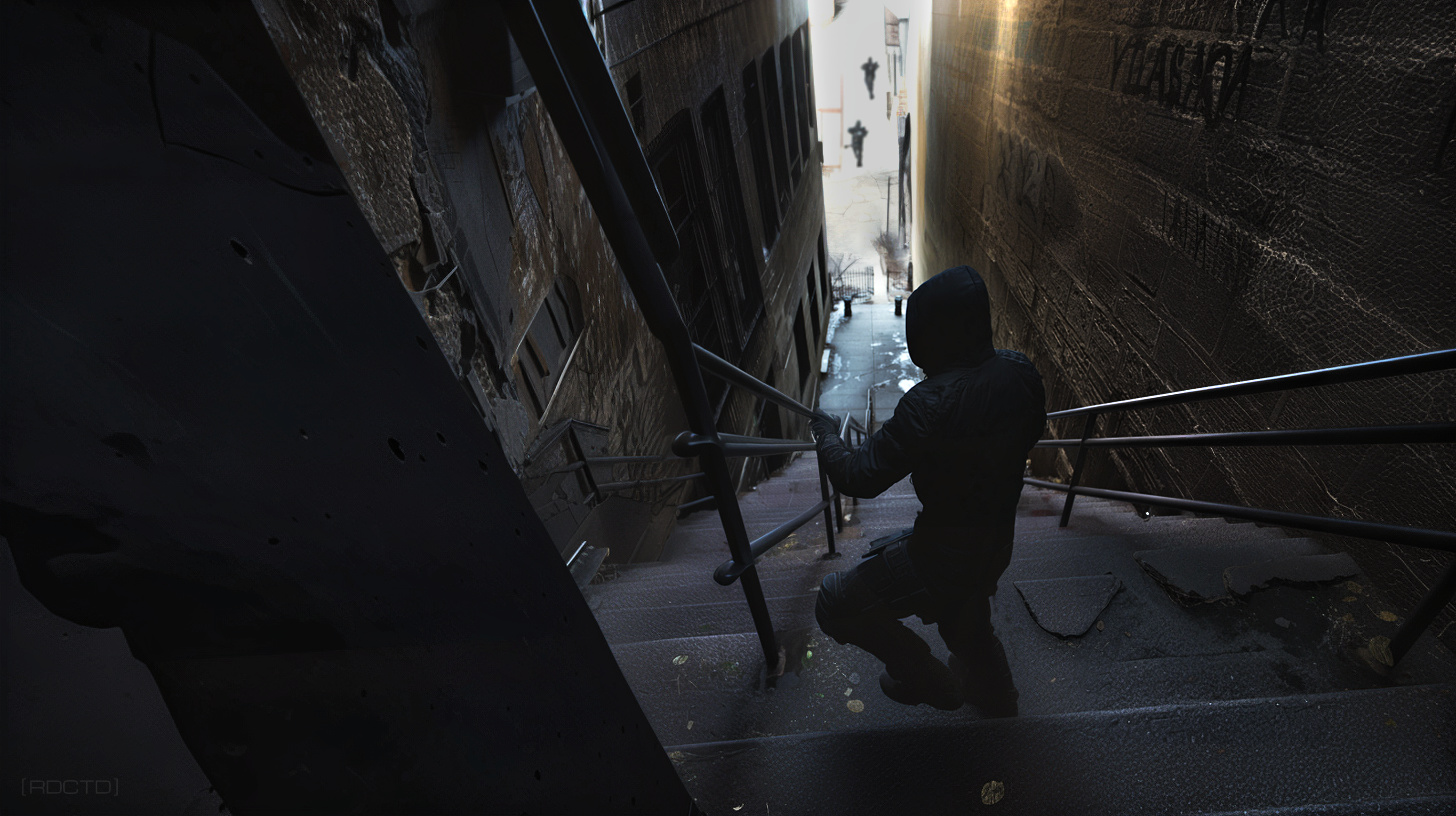
 The Rapid method is a condensed, on-the-fly Surveillance Detection Route (SDR) tradecraft skillset designed for covert operatives who need to quickly respond to hostile operators in an unfamiliar location:
 ![]()
This technique guide is for impromptu yet immediate confirmation and separation, which is excellent for exigent personal security in a newly placed foreign location. However, it’s not a substitute for deliberately planned, fully-fledged surveillance operations. Used to buy time and force a reaction – prioritize extraction, visibility, and documentation over engagement.
![]()
A tracker doesn’t care how fast you run, only how predictably you move. Velocity without variation just shortens your leash.
![]()
[ STEP 1 ]
![]()

Adopt The Rapid-Detection Mindset
The moment you suspect you’re being watched or feel asymmetry in the environment, switch from routine to detection mode. Raise your cognitive margin, reduce tunnel vision, and begin running checks without hesitation.
Use a short internal checklist (visibility, egress options, crowd density, likely witnesses, comms status). Don’t freeze; fixate on simple measurable cues – direction of approach, repetition of faces or vehicles, and whether someone’s behavior correlates to yours. That baseline is your anchor: you’ll compare anything you later see against it to judge whether suspicion is meaningful.

![]()
Surveillance only wins when it stays invisible, your route is designed to drag it into the light.
![]()
[ STEP 2 ]
![]()

Select Routes/Anchors by Principle
Map navigation don’t apply here. In an unknown area you can’t preplan. Choose paths that maximize options – stay where there’s a mix of public exposure and clear exit avenues (multiple streets, open businesses, transit hubs).
Prefer linear segments with intersecting cross streets (more escape vectors) and avoid isolated funnels. Use natural anchors – cafés, staffed stores, police stations, busy transit stops – as places to confirm or break contact. Don’t try to memorize turns; pick decision-points (a corner, a light, a doorway) you can use to observe and react without committing to a single escape trajectory.
![]()
False positives cost time, false negatives cost blood. Bias accordingly.
![]()
[ STEP 3 ]
![]()

Initiate Fast, Observable Checks
Execute two or three brief, low-cost checks to test whether the concern is real. Make an innocuous deviation: change pace, step into a shop, make a visible phone call, or cross the street and then continue.
Watch behavior for reflexive, repeated matching (the same person or vehicle reappearing following the deviation), unusual fixation on you, or signs of coordination (vehicles slowing as you pass, pedestrians timing their movements). These are indicators, not proof – treat each as accumulating evidence that raises your threat score until it does become proof.
![]()
Speed is a tax on your perception, move only as fast as you can still think optimally.
![]()
[ STEP 4 ]
![]()
Use Short, Reversible Maneuvers
Keep options open by being flexible. If indicators persist, escalate detection incrementally. Increase the granularity of checks (longer stop in a staffed venue, ask a clerk a question, enter a restroom or concierge desk area) while keeping movements reversible and non-isolating.
Avoid deep commitments (no long detours into alleys or locked stairwells) unless absolutely sure of the efficacy of the route. Your goal is confirmation with minimal exposure. If the pattern disappears after a check, you’ve likely cleared the event. If it tightens or follows, you’ve upgraded the threat status and should move to controlled withdrawal or contacting support.
![]()
Randomness without reason is noise, a nuisance. Controlled variability is pressure, an obstacle.
![]()
[ STEP 5 ]
![]()

Decision Matrix
This is specifically based around for when to disengage, confront, or call. Convert the indicators you’ve gathered into a binary decision within seconds. The matrix elements are: safe-to-proceed (resume mission), maintain surveillance (if mission-critical and you can do so safely), or abort and extract.
If the threat score crosses your abort threshold – direct approach, obvious coordination, blocked egress, or access to weapons – move immediately to the safest option. Head to the nearest crowded or staffed location, call for help using pre-arranged protocols, and prioritize distance and visibility. Confrontation is generally last-resort. In most personal-security scenarios you’re seeking separation and documentation, not a fight.
![]()
Never mistake movement for maneuver. An SDR only works when each step changes the geometry of risk.
![]()
[ STEP 6 ]
![]()

After-Action Review
Once clear, document what you observed. Time, locations, descriptions, and what checks you ran – and debrief to refine thresholds and anchor choices for the future. Train the SDR Rapid frequently in low-risk settings so the shifts in pace, the verbal cover stories, and the decision thresholds become reflexive.
Regarding equipment – keep redundant comms, a small pocket notebook or encrypted logging method, and maintain awareness of local resources. The SDR Rapid is excellent for immediate screening, but it relies heavily on practiced judgment. Train it, keep it conservative, and integrate it into broader escape-and-evasion tradecraft rather than treating it as a standalone fix.

![]()
Tradecraft is compression – reducing complex environments into a few decisive checks under stress.
![]()
[ FINAL ]
![]()
The value of the Rapid method is that it buys you time. Time to confirm, time to choose, time to act. In the field, hesitation kills options, but a practiced SDR keeps the initiative in your hands. That shift in control is the real skill: using movement, observation, and decision points to dictate the pace of the encounter. The faster you can impose it, the safer you’ll be, and the more freedom you’ll keep to finish the mission or walk away intact.
![]()
// An SDR isn’t passive defense, it’s active control of tempo. You set the rhythm, the adversary has to dance.
[INFO : SDR Civilian Manual]
[OPTICS : Prague, Czech Republic]